
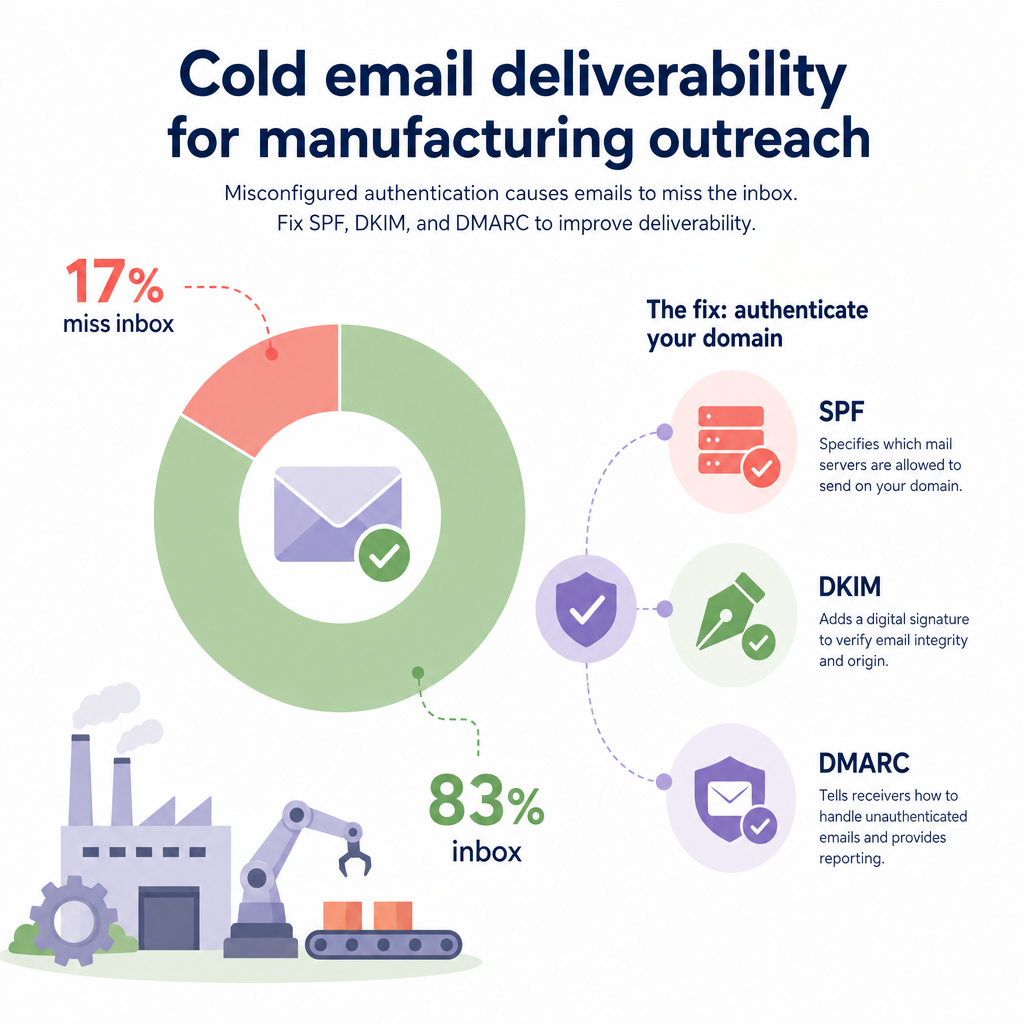
Why are your manufacturing outreach emails suddenly vanishing? With 17% of cold emails never reaching the inbox due to misconfigured authentication, setting up your DNS records correctly is the single most effective way to protect your sender reputation and land in front of key decision-makers.
Why manufacturing sales emails get blocked
In industrial sales, you are often reaching out to busy plant managers, engineers, and supply chain directors. If your emails do not land in their primary inbox, you miss out on high-value contract opportunities.
Recently, Google and Yahoo introduced strict authentication rules for domain senders. If you send outbound outreach – especially if your total sends approach or exceed 5,000 messages per day – you must have proper SPF, DKIM, and DMARC records configured. Neglecting these rules will trigger spam filters and ruin your domain reputation.
Proper technical setup is not just about compliance; it is a critical revenue driver. For instance, a UK manufacturing firm implemented these standard protocols and saw its outbound email deliverability increase from 76% to 94% in key Asian markets over just six weeks.
Step 1: Set up SPF (Sender Policy Framework)
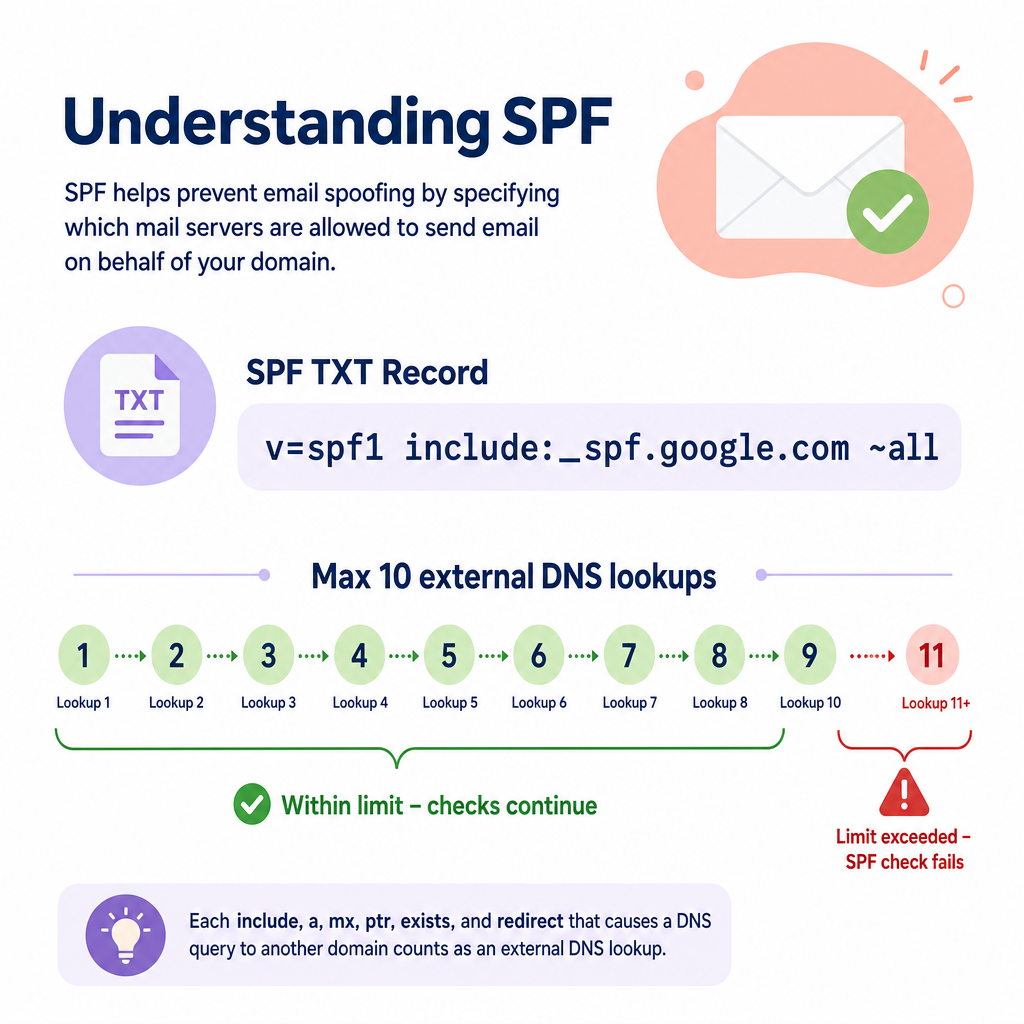
Think of SPF as an approved guest list for your domain. It is a text (TXT) record published in your Domain Name System (DNS) that explicitly lists which mail servers are allowed to send emails on your behalf. If a server tries to send an email using your domain but is not on this list, receiving servers will flag the message as suspicious.
To configure your SPF record, use the following process:
- Locate your DNS provider: Log into the platform where you purchased your domain, such as GoDaddy, Cloudflare, or Namecheap.
- Check for existing records: You must only have one SPF record per domain. Multiple SPF records will cause authentication checks to fail automatically. If you already have an existing record, you must edit it instead of creating a new one.
- Draft your record: Your SPF record must always start with the version tag
v=spf1. - Add your sending services: Include your specific email providers. For example, if you use Google Workspace, your record will include the tag
include:_spf.google.com. - Choose your failure policy: End the record with either
~all(a soft fail, which flags unauthorized mail but still allows it through) or-all(a hard fail, which instructs receiving servers to reject unauthorized mail outright). - Publish the TXT record: Set the Host or Name field to
@(or leave it blank depending on your host) and paste your configured value.
An example of a correct, standard SPF record looks like this:
v=spf1 include:_spf.google.com ~all
The SPF standard (RFC7208) limits your record to a maximum of 10 external DNS lookups. If your record requires more than 10 lookups to verify all your connected services, SPF checks will fail with a permanent error status. This failure can block your automated outreach campaigns from reaching their destination.
Step 2: Configure DKIM (DomainKeys Identified Mail)
While SPF lists who is allowed to send mail, DKIM proves that the message was not tampered with during transit. It adds a cryptographic digital signature to the header of every outbound email you send.
DKIM works using a public-private key pair. Your email provider signs outgoing messages with a private key, and the recipient’s server uses your public key (published in your DNS) to verify the signature. To find this public key, receiving servers use a unique identifier called a “DKIM selector.”
To configure your DKIM record, follow these steps:
- Generate your keys: Log into your email admin console, such as Google Workspace Admin or Microsoft 365 Admin, and generate a new DKIM key.
- Identify your selector: Your provider will give you a specific selector name, such as
googleorselector1. - Add the DNS record: In your DNS manager, create a new TXT record.
- Enter the host name: Use the format
selector._domainkey. For example, if your selector is Google, the host name will begoogle._domainkey. - Enter the value: Paste the long public key string generated by your email provider.
Setting up DKIM ensures your domain aligns with the latest Google and Yahoo email requirements, protecting your business from domain spoofing and improving trust with corporate IT departments.
Step 3: Implement DMARC (Domain-based Message Authentication, Reporting, and Conformance)
DMARC is the final piece of the email security puzzle. It tells receiving servers exactly what to do if an email fails either SPF or DKIM checks. It also sends reports back to you so you can see if anyone is trying to spoof your domain.
To configure your DMARC record, apply these steps:
- Create a new TXT record: Go to your DNS hosting provider and add a new TXT record.
- Set the host name: Use the host name
_dmarc. Your DNS provider will automatically append your domain, making the full path_dmarc.yourdomain.com. - Configure the required tags: Every DMARC record must include the version tag (
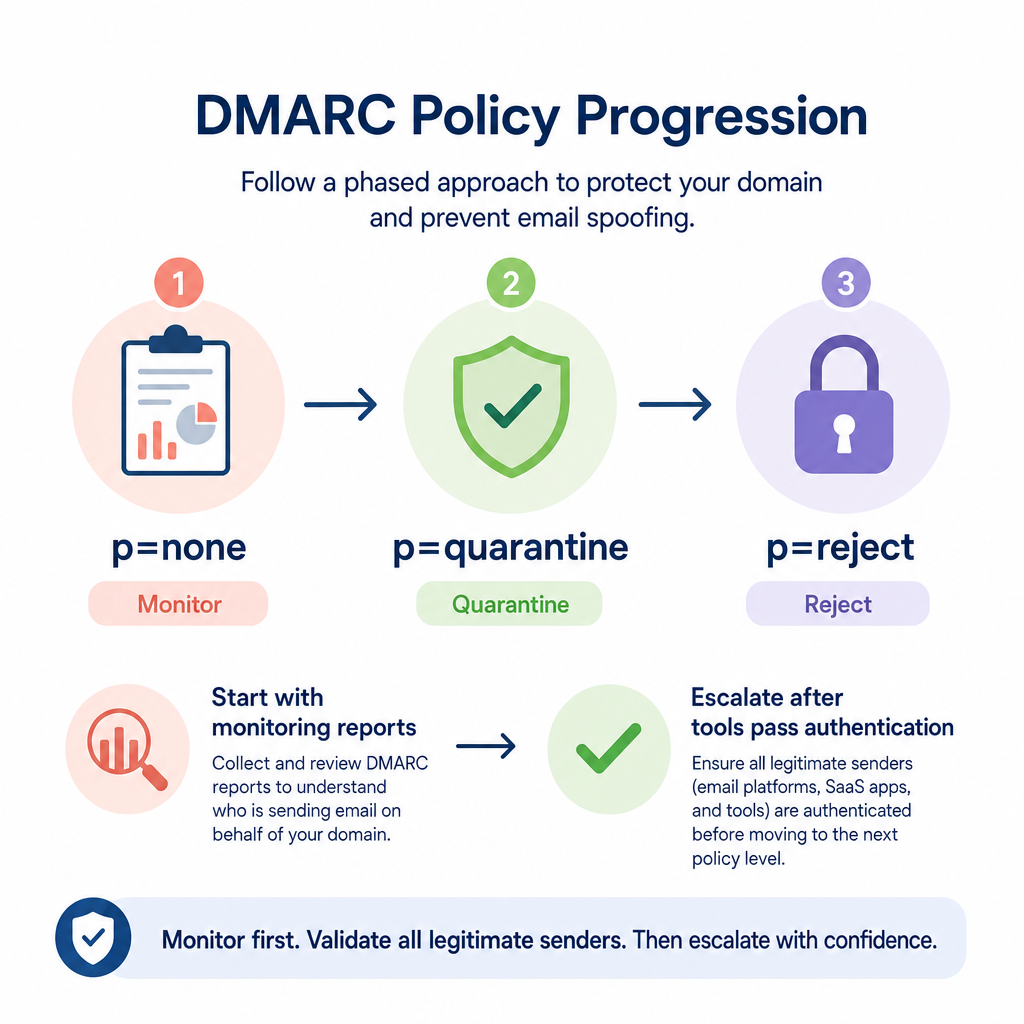
v=DMARC1) and the policy tag (p=). - Select your policy stage: There are three policy options you should progress through as your domain health stabilizes. Start with
p=none(monitoring mode, which collects reports but does not block emails). Later, transition top=quarantine(sends failed emails to the spam folder) and finallyp=reject(blocks failed emails entirely). - Set up reporting: Add the
ruatag with an email address to receive aggregate XML reports.
A typical starting DMARC record looks like this:
v=DMARC1; p=none; rua=mailto:dmarc-reports@yourdomain.com
Always start with p=none to analyze your reports first. Once you confirm all legitimate sending tools, like your CRM or manufacturing ERP, are passing authentication, you can safely escalate your policy to protect your global sales pipeline.
Beyond DNS: Maintenance for outbound sales deliverability
Configuring your DNS records is highly important, but it is only the first step. To consistently bypass spam filters and maintain high placement rates in your manufacturing cold outreach, keep these best practices in mind:
- Warm up new domains gradually: Do not start blasting high volumes of emails from a brand-new domain. Start by sending 10 to 20 emails daily. Gradually increase this volume by 10% to 15% each week to establish a positive sender reputation.
- Clean your contact lists regularly: Protect your reputation by removing unengaged contacts after 3 to 6 months of inactivity. Ensure your bounce rate stays under 2% and your spam complaint rate remains strictly below 0.1%.
- Avoid generic templates: Modern spam filters easily flag generic, mass-sent templates. Do not use tired subject lines like “checking in” or “following up.” Instead, write personalized, short messages that address specific manufacturing facilities, local challenges, or recent industry events.
Maintaining this level of technical hygiene and personalization manually can consume hours of your sales team’s week, taking focus away from closing deals.
Using modern tools can ease this burden. Many industrial sales teams deploy AI sales automation to handle list validation, custom writing, and reputation monitoring in real time.
If you want to automate the complex, manual parts of outbound sales without sacrificing deliverability, Sera can help. Sera acts as an AI-powered outreach autopilot. It uses six specialized, human-supervised AI agents to build highly targeted lists, research prospects, write personalized emails, and safeguard your domain reputation.
To see how Sera can keep your sales pipeline full of qualified meetings, explore Sera’s AI Autopilot today.